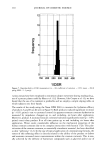
LINEAR SKIN RHEOMETER 327 INSTRUMENT SOFTWARE The LSR software runs on a standard IBM (or compatible) PC of at least 386 33 MHz speed, and is sourced in C programming language. The closed loop control employed by the LSR is achieved as follows: As the LSR control loop is a sampled data system, it is essential that a fast real-time clock is generated that triggers the measurement of data samples and updates the control signal output. All IBM PCs have as standard a user interrupt (on interrupt vector 0 x lc) called the "timer tick," which is available for programmers to use as a regular timing source. This timing signal is generated from the 4.192 MHz system clock via an Intel 8253 programmable interval timer. The BIOS presets this timer to its full scale of 65536 and, therefore, the "timer tick" interrupt is normally 18.188 Hz. This is far too slow for a sampled data system. This problem is overcome by reprogramming the 8253 divider to give the desired frequency during the measurement cycle, in this case 1 KHz. In order, however, not to disrupt important internal functions such as monitoring disk drive heads, the timing of interrupt 0 x 8 (the interrupt number actually triggered by the 8253 output) needs to be restored. This may be achieved by not using interrupt 0 x lc, but replacing the BIOS interrupt function at 0 x 8 with the control program itself. The original timing is derived within the new interrupt 0 x 8 by installing a simple counter and calling the BIOS interrupt at the correct interval. In this way, a fast timer is generated that allows data sampling at 1 KHz but that does not harm other internal PC operations. CALIBRATION OF THE LSR A simple calibration jig has been designed and built that allows rapid, absolute cali- bration of actual force and displacement (Figure 6). Displacement is measured by a 10-1am-resolution digimatic indicator [Mitutoyo (UK) Ltd, Warwick, U.K.], traceable to NAMAS calibration standards. Force is measured by a 10-g load beam (Maywood load beam, type 49034, Maywood Instruments Ltd, Basingstoke, U.K.) with 10 mg accu- racy, also traceable to NAMAS calibration standards. The load cell calibration factor is expressed in terms of mV signal per volt per gram measured. The output signal is then amplified through a proprietary amplifier (May- wood amplifier, type D2000, Maywood Instruments Ltd) set to a nominal gain of 325. The amplified signal is then converted via the MIO16 interface card (ADC) such that a full-scale reading of 2048 is equal to an input of 10 V. The calibration factor is expressed in terms of an ADC input reading that equals 1 g. The following values are required: The load cell calibration value taken from its certificate, L The bridge supply voltage measured with a NAMAS calibrated digital volt meter, B The gain of the amplifier measured with a calibrated digital volt meter, G The correction for the digital volt meter taken from its certificate, C Thus, L = mV per V per g at a nominal voltage of 10 V output from the sensor for a 1-g load = (L * B * C)/10 output from the amplifier for a 1-g load = (L * B * C * G)/10 and the ADC input reading for a 1-g load = (L * B * C * G * 2048)/(10 * 10). The LVDT calibration factor is expressed in terms of mV output per volt per mm
328 JOURNAL OF COSMETIC SCIENCE Figure 6. LSR calibration jig. displacement. The final slope is expressed in terms of ADC input per mm displacement. The following values are required: The LVDT calibration value from its certificate, L The excitation voltage measured with a NAMAS calibrated digital volt meter, V The correction factor for the digital volt meter taken from its certificate, C The slope value is derived as follows: output voltage for 1-mm displacement = (L * V ß C), and the ADC input reading for 1-mm displacement = (L * V * C * 2048)/10.
Purchased for the exclusive use of nofirst nolast (unknown)
From: SCC Media Library & Resource Center (library.scconline.org)


